
EagleConnect Outlook Configuration
How to Configure Outlook to check EagleConnect Email
Outlook is available for Windows and Mac OS X environments. Follow the appropriate instructions that correspond to your system.
*Notice* As an currently enrolled, active student at UNT, you receive the latest version of Microsoft® Outlook - as well as the rest of the Microsoft® Office suite – at no cost – through your UNT-supplied EagleConnect account. Find out more here.
Microsoft Windows & Outlook 2013
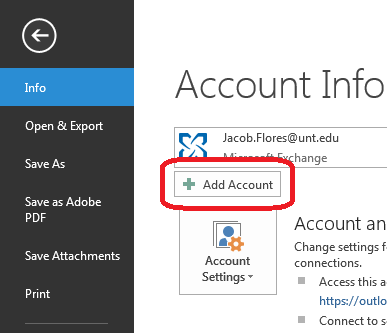
With Outlook open, click on File at the top left and select Add Account.
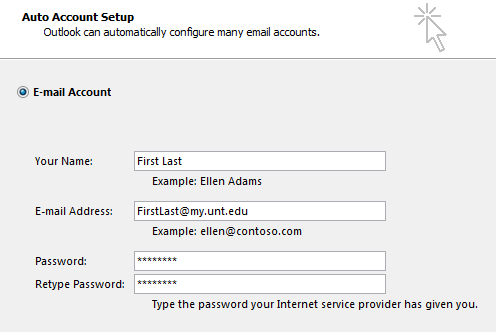
Fill in your information in the form. Once the form is completed, select Next.
Name: Your name
Email Address: Your EagleConnect email address (FirstLast@my.unt.edu)
Password: Your password
It is likely that Outlook will auto-detect all the needed settings. If it does not, use the settings below.
Service: Microsoft Exchange
Server: outlook.office365.com
Username: Your EagleConnect email address (FirstLast@my.unt.edu)
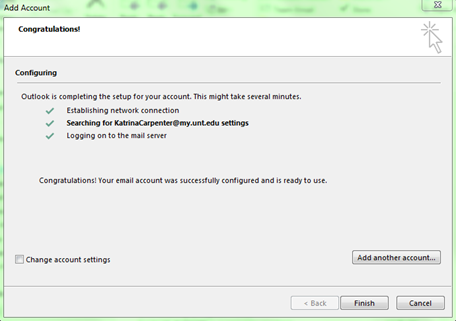
Wait a moment for the account to configure, then you should receive a page that says "Congratulations!" at the top, such as the one below. This indicates that the account is successfully configured.
Restart Outlook to begin using your email account with Outlook.
Mac OS X & Outlook 2011
With Outlook open, click Outlook on the menu bar at the top left and selectPreferences.
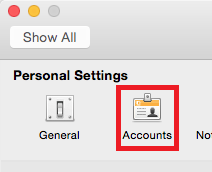
Under "Personal Settings," select Accounts.
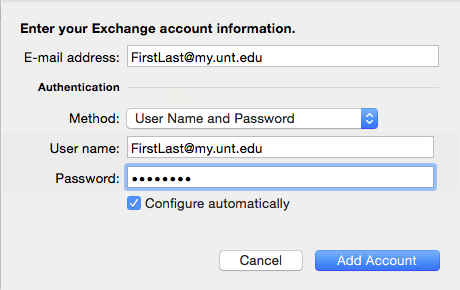
Select the Exchange or Office 365 account type. Enter the following into the window that appears, and select Add Account.
E-mail address: Your EagleConnect email address (FirstLast@my.unt.edu)
Authentication Method: User Name and Password
User name: Your EagleConnect email address (FirstLast@my.unt.edu)
Password: Your password
Check the box for "Configure automatically"
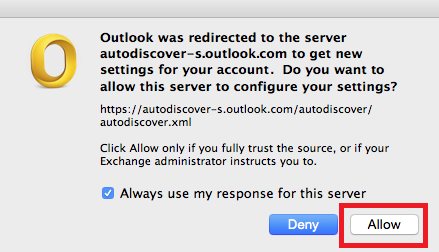
You will be asked if you want to allow the server to configure your settings. Check“Always use my response for this server” and click Allow.
Your EagleConnect account should now be configured with Outlook.